Saturday, January 29, 2011

Sam's Wrap


 I’ve always wondered how much time I spent on my feet for the past 2 decades preparing food. I even tried once wearing a pedometer just to see how many steps I took in a normal day of running up and down the hot line. Running around the prep counter too the fridge and back, and running sauté pans back and forth to the dishwasher. At the end of the night (1 AM) when I sat down for my typical shift drink of Makers Mark and Coke with my good friend Michelle while she was counting the nightly tips, I looked at my pedometer, and to my shock I walked 12 miles. That made perfect since seeing how my feet felt. I suppose a chef can gauge his time in kitchen by his feet, at lest I can. Mine are shot after so many years on them. Of course it doesn’t help with my ankles being a complete mess from playing hockey during high school with sprain after sprain. I think to myself, Good Times!

I recall a span of years on my feet, that are my fondest and dearest memories, but also, the most physically hardest I ever had. Those years were spent flipping burgers and spinning pizza and moving freight up and down from the root cellar of this 200 year old building. Those years were packed with laughter and being around genuinely great people and customers. That time resulted in a lasting friendship with my best friend. I would have liked to think that those times would have lasted forever, but like all things in life, people move on to chase after there goals and dreams. I would love to name off the people I came to call my friends for life, but that would probably be embarrassing for them.


This isnt the original photo, but many
will recall the underwear tree!
Many good memories!
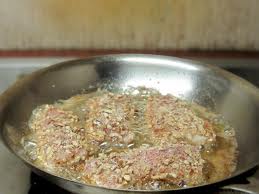
Those days in that kitchen and the hours upon hours in it on my feet, were spent trying to create new things to eat. We all just loved to experiment. Even though it was short order Bar and Grill food, it never stopped us. The Hamburgers that we made up, would pretty much kill, or seriously injure anyone with the slightest heart condition. The thousands of Wraps we experimented on our customers, most of them not leaning on the healthy side of life. Many have been forgotten but a few still stand out in my mind. And of course we won’t forget the deep fryer! I don’t think there was one item in that kitchen we didn’t try to deep fry at some point in our experiments. I even attempted to batter and deep fry one of the staple hamburgers that this place was known for. I’m sad to report it was not a success and I spent a good part of one afternoon draining and filtering and cleaning the fryer.

An amazing thing about reflecting on this time is that a lot of those people I worked side by side with moved on in the culinary field. Those friends now work to this day, in kitchens around the world. One of them even opened his own successful restaurant here were I live, which I might add, is a local favorite. I’m proud that I stood next to these people through the 100 plus degree kitchens in the dead of summer slinging out great food and many colorful phrases and nicknames.

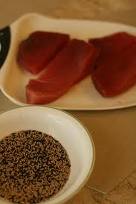
Of the many thousand upon thousands of things that came across that kitchen grill, none stand out in my memory more so than a wrap called the “Sam’s Wrap”. It kind of had a local cult following, but those who had it could never get enough of it. It popped back into my mind because several weeks ago I was asked to recall how it was put together for one of the former Prep Cooks who couldn’t remember all the steps. So they called my best friend and then he tracked me down so we could conference call and I could refresh the steps. Once this was done and we did a little reminiscing and laughing I couldn’t get the damned wrap out of my head. So, instead of making it and blowing the diet that I’m slowly day after day failing at, I will post it so maybe one of you can enjoy it. I’ll just think about it and let drool drip down my chin.


Sam’s Wrap

Large flour tortillas (Herb flavored if you can find them)
1 lb Honey Smoked thick Bacon
Vinaigrette Marinated Chicken (grilled)
Swiss cheese
1 container of Button Mushrooms
¼ head of Iceberg lettuce Shredded
Ranch dressing (not store bought, use homemade, it just tastes better)
¼ cup Clarified butter


Prep:
Marinate your Chicken for 24 hours in Vinaigrette.

Make your Ranch dressing and refrigerate 24 hours.

Grill Chicken, after chicken is done, let cool, then cut into ¼ inch thick long ways. Should look kind of like chicken French fries once done. Set aside in bowl.

Cook bacon on a cookie sheet so you can drain off excess bacon fat. Once done set aside bacon to cool. Once cooled rough cut bacon and set aside in bowl.
Wash Mushrooms then drain and dry. Remove all steams. Slice mushrooms into ¼ inch. Set aside in bowl.

With a food processor, if you have one, finely shred your Iceberg lettuce.; Set aside in bowl.


Getting HOT:
Place sauté pan on med high heat. Once Pan is up to heat apply ½ of your clarified butter in pan, then add 1 handful of your mushrooms. Sauté mushrooms for about 1 min adding more butter if needed. After 1 min add bacon and chicken, and finish off sautéing. Keep in mind that the bacon will add more grease as it reheats so be sparingly with the butter. After another minute, place Swiss cheese on top of your mushrooms , chicken and bacon in the sauté pan. Removed pan from heat and place a cover over the pan to melt the Swiss cheese


Finishing:
At this point you will want to warm your flour tortilla up either on another large sauté pan or a flat top grill if you have one. This should only take a few moments to warm each side.

Place your tortilla on a flat surfaced counter. Put a small handful of shredded lettuce in center of tortilla. Pour a little ranch dressing over the lettuce to coat it as if you’re prepping a salad to eat. Slide your mushroom, chicken, bacon, and Melted Swiss onto the top of your shredded lettuce and ranch. Top off with just a little bit more ranch.


Folding:
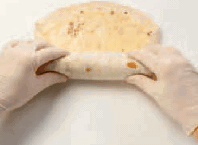
Now fold the bottom lip of the tortilla forward over the mound of goodness. Then fold over both left and right ends of your tortilla. Now roll the rest of the tortilla away from you keeping the roll tight but not to tight so the tortilla ruptures, which happens a lot till you get use to the feel for it.

If you have some parchment paper, you can roll the Wrap into that after you finish rolling the tortilla. This will help keep the wrap together and so you can cut it in half to serve and also to keep it from exploding in your hands.

***Makes 1 to 4 Warps depending on portion sizes***


Even thought this restaurant and Bar/ Grill wasn’t haute cuisine by any standard and was never expected too be, the food was always good quality. I think of those times often every morning I drive by the place on my way to work. Over time the food and atmosphere have changed and it has lost its appeal to me so I don’t eat there but maybe once a year. A lot of blood, sweat, and tears were poured into those building and those of us that spend many hours on our poor hurting feet have a lasting love and friendship.

Finito!

Friday, January 28, 2011

Tapas

 
Are you planning your super bowl party yet? Same here, I have been thinking hard what to prepare. Chicken wings, chili, chips and dip, Stuffed peppers, and BBQ ribs. Those are just a few staples that we have had in the past. This year however, I’m planning something a little different. Tapas! Of course I’ll do a few staples, but my main theme will be Tapas. I will admit for the longest time, for some odd reason I thought Tapas were like pita bread stuffed with goodies, kind of like a vegetarian version of a gyro. I have no explanation why I thought this.


A little background via Wikipedia: Tapas (Spanish pronunciation: [ˈtapas] is the name of a wide variety of appetizers, or snacks, in Spanish cuisine. They may be cold (such as mixed olives and cheese) or warm (such as chopitos, which are battered, fried baby squid). In select bars in Spain, as well as some parts of North America and the United Kingdom, tapas has evolved into an entire, and sometimes sophisticated, cuisine. In Spain, patrons of tapas can order many different tapas and combine them to make a full meal. In some Central American countries such snacks are known as bocas. The serving of tapas is designed to encourage conversation because people are not so focused upon eating an entire meal that is set before them. Also, in some countries it is customary for diners to stand and move about while eating tapas.

I can’t think of anything more appropriate for a Super Bowl Party. Even though my poor wife is brooding over the fact that her beloved Chicago Bears didn’t make it this year, she still is a good sport and looking forward to our party with friends. I will be having my own Super Bowl of tapas in the kitchen along with other staples I’ve made in the past like, New Zealand Green Mussels in a Butter and Bourbon sauce, one of my personal favorites.

I have prepared Tapas a few dozen times for some private caters and a few big events. Thought they require a lot of forethought and preparation, they are fun to make and even more fun to eat. I often incorporate different ethnic themes into the Tapas depending on the people I’m cooking for. Most often the traditional Tapas are chosen because many people have not tried them. These are a few of the choice that people enjoyed and tend to be popular: Chickpeas and Spinach, Clams in Sherry Sauce, Octopus & Paprika, Meatballs in Almond Sauce, Fried Cheese, Quail and Onions, Dried Cod & potatoes, Sole with Raisins & Pine Nuts and Grilled Pork. I picked these because I’m most familiar with them.

You may be thinking that this seems like more than you can handle, but I assure you, once you get started you will be pleasantly surprised how easy they are to prepare. The intimidation factor will be all the ingredients you will have to shop for, but I’ve never met a person who didn’t enjoy shopping to some degree.

Chickpeas, Bacon and Spinach Tapas

3 slices thick-cut bacon, or pancetta
Olive oil
15-ounce can chick peas, drained and rinsed
½ teaspoon red pepper flakes
½ teaspoon (smoked Spanish paprika) or regular paprika if not available
8 ounces spinach
1-2 garlic cloves, minced

Preparation:
Render bacon for about a minute, to get rid of excess fat. Then chop and sauté over medium heat in a heavy skillet until bacon begins to brown. Add chick peas, pepper flakes, and a couple tablespoons oil, and sauté until chick peas begin to brown, (about 4 minutes). If dish seems dry, drizzle a little more oil. Add spinach, paprika, and garlic and sauté until spinach sweats down, 1-2 minutes.

Salt and pepper to taste.

Octopus & Paprika Tapas

1-2 pounds octopus
1/2 teaspoon sea salt
1 teaspoon black pepper
3 chopped garlic cloves
1 tablespoon sweet paprika
1/2 cup olive oil
2-3 lemons

Preparation:
Braise your octopus, meanwhile, put the salt, pepper, paprika and garlic in a mortar and pound it until it is a paste. Slowly add the olive oil, stirring and mashing all the while. If you don’t have a mortar and pestle, you could use a food processor, but the texture will be different.

When the octopus is tender and still warm, cut into chunks, put into a large bowl and toss with the sauce. Squeeze the juice of 1 lemon into the bowl and toss to combine.

Serve warm or at room temperature with slices of lemon.

Meatballs in Almond Sauce Tapas

3/4 cup panko bread crumbs
3/4 cup dry white wine
1/2 cup dry sherry
13 cloves garlic, peeled
3/4 lb. ground beef
3/4 lb. ground pork
3/4 lb. ground veal
2 eggs
5 tablespoon minced parsley
2 1/2 teaspoon salt
freshly ground pepper
2 tablespoon olive oil
1 onion, finely chopped
1 carrot, peeled and finely chopped
1 c. slivered blanched almonds
1 14 1/2 oz. can beef broth
1/2 cup fresh or frozen peas
1 bay leaf
2 scallions, chopped

Preparation:

Soak the bread crumbs in 1/4 cup of the white wine. Finely chop 3 cloves of garlic and combine with the bread crumbs, meat, eggs, 3 tablespoon of parsley and the salt and pepper. Form into ping-pong sized balls.

Place the meatballs on a baking sheet and cook through in a hot (ideally convection) 350 degree oven for 20 minutes. Meanwhile, in a 14" paella pan, sauté the onion and carrots in the olive oil until soft. Stir in the remaining white wine, the sherry and the other 10 cloves of garlic thinly sliced. Boil until most of the liquid has evaporated.

In a food processor grind the almonds as finely as possible. With the blade running, pour in the beef broth in a thin stream. When well mixed, pour into the paella pan, bring to a boil and add the remaining parsley, peas, bay leaf, scallions and more salt and pepper as needed. Slip in the meatballs, gently mixing them around so they are coated with the sauce. Lower the oven to 300 degrees, cover the pan with foil and bake for 45 minutes.

Serve hot.

Grilled Pork Loin, Pancetta and Mushroom Tapas

Bamboo skewers (12)
4 slices (1/2-inch thick) boneless pork loin
1 slice of pancetta
4 whole small white mushrooms
4 slices rustic baguette

Preparation:
Soak the bamboo skewers for approximately 30 minutes in water, so that when placed on grill they do not burn.
Cut the slice of pancetta into quarters.
Rinse the mushrooms thoroughly.
Lightly salt both sides of each pork loin. Slide each onto the bamboo skewers. Carefully slide on the quarter slice of pancetta and the whole mushroom.
Place skewers over a medium hot grill and cook the loin for approximately 5 minutes on each side, until cooked.
Remove the skewers from the grill and place on top of bread slices. Serve hot.


I hope one of these might inspire you and possibly show up on your super bowl table. I do like the fact that they are meant as appetizers but can totally be transformed into an entree. Enjoy your super bowl and drive safe.


Finito!

Saturday, January 22, 2011

Mahi-Mahi Sandwich with Garlic Aioli

I went to bed last night thinking about my tropical island in the South Pacific. I drifted off to sleep revisiting my memories of Amy’s and mines experiences. Wondering to myself, how to revisit and recreate those expenses in my own home here in Wyoming. A daunting task to be sure. Firstly, I don’t have Farmers markets readily available to me to buy fresh fish, herbs, breads, cheeses, fruits, and things I’ve never seen or cooked with. Be that as it is, I can make the best of the situation and move forward. My father once told me you can wish and want all you can, but in the end you still are just wishing and wanting with nothing to show for your efforts.


(Enter memory)
My very 1st time deep sea fishing I caught a Mahi-Mahi. Not a huge Mahi-Mahi but compared to my typical fly-fishing trips and the trout I produced this thing was gigantic! I could make up a story about how epic the catch was and compare it to an Ernest Hemingway moment at sea, but it really wasn’t. Being me, I dressed for the occasion with the loudest swim trunks I could find, that looked a lot like I was wearing a Sarong. In retrospect it wasn’t the most “Man” outfit in the world, and it screamed “I don’t take fishing seriously.”

When we showed up at the docks and found the deep sea ship we would be going out on, it never accord to me “Not” to ask the Captain, “Permission to come aboard Sir?” only to have a quick and not-so-friendly reply, “what are you, a vampire or something?” I still to this day feel that’s when the relationship with our host that afternoon went awry. Once aboard everyone, except myself, went to the top of the ship to where the Captain was steering the vessel. Now, I have a bit of experience from my youth and my adventures as a California sea scout, that when going out on a vessel to sea, being at the highest point of the ship is beautiful and spectacular, but if you don’t have “sea legs” and a sold stomach, you are doomed from the beginning.

Well, needless to say most everyone turned green once we were out of the Harbor and into what I thought was a relatively calm ocean. One by one my wife and our friends, came down below to try and calm themselves since the captain threaten them to “NOT” puke oh his deck or he would make them walk the plank. All the while I sat in the fishing chair at the back of the ship, getting instruction on how to reel in the mighty marlin we may catch today. After about 15 or so minutes of instruction, the 1st mate asked me, “Do you normally dress like this.” At which point I replied, “Like what?” My second mistake of our trip.

After an hour or so of relaxing and enjoying the waves and the smells of the ocean and its deep blue color with the contrasting skyline, I hear the 1st mate yelling at me, “FISH ON!” I replied, “On what?” I was quickly ordered with a few colorful directions to get into the fishing chair. I scrambled into the chair and buckled in, at which point he 1st mate slammed the rod between my legs. You ever have those moments in life were someone gives you something very quickly and you know what needs to be done, but you just stare at them with a stunned deer in the headlight look and are just completely stupefied? Well, that’s pretty much the following moments after I was handed the Fishing Rod. Once I gained my senses and received some more colorful instructions from the 1st mate, I landed my very 1st Mahi-Mahi. The 1st mate had gafted the fish and threw it into a big cooler so it wouldn’t bleed all over the Captains deck and flop all over the place, possibly getting one of us tangled in the line or even worst, hooked. Once the fish stopped pounding the interior of the cooler, the 1st mate opens the lid to let me see my mighty catch. I was so proud to have caught my 1st deep sea fish ever. I asked the 1st mate if this was one of the biggest Mahi-Mahi he ever seen caught. He looked at me, looked down at my swim trunks, and scoffed, “That was just a baby.” My balloon of pride was pricked! That Mahi-Mahi was our 1st and only fish caught that day.


Me and my HUGE Mahi-Mahi.
Notice the 1st Mate in the background looking
twords the parking lot?  He's watching my Best friend
Blowing cookies in the parking lot

Now, that wasn’t the only event going down on the Ship that day. My best friend was working on his 12th shade of green, all the while, sitting near the railing trying his best not to lose his cookies. Maybe, for him this very pricey deep sea excision wasn’t a stroke of genius on all our parts, since prior to going to the island together, he had fought for months with Vertigo. To his honor, we did make it back to the dock after cutting the trip a few hours short before he lost his cookies in a parking lot trash can. What a trooper. We thanked our not-so friendly hosts and tipped the 1st mate and departed.

In retrospect, I enjoyed that time and would do it again in a hart beat. I came away with fresh fish for our meal and a memory that I will never forget. A few life lessons as well.

The following recipe is what I made with our fresh caught Mahi-Mahi for the four of us. I made this along with some Fresh Sea Salmon I baked with the Garlic Aioli and Scallops I bought from one of the local fresh seafood markets. With all that and some of the local farmers market fruit and cheeses, it was an experience we still talk about.

Mahi-Mahi Sandwich with Garlic Aioli

Ingredients
Grape seed oil, for frying
2 1/2 pounds Mahi-Mahi
3 tablespoons seafood seasoning, plus more for sprinkling
2 cups all-purpose flour
2 cups panko bread crumbs
3 eggs beaten
Garlic Aioli, recipe follows
1 large French baguette, cut into 4 servings
12 tomato slices
8 romaine leaves
1 small red onion, sliced thin

The Prep:
Preheat oil in sauté pan.
Lightly sprinkle your Mahi-Mahi with seafood seasoning on both sides.

Doctor Dredge:
In 3 separate bowls:
1st Bowl, flour mixed with 3 tablespoons seafood seasoning.
2nd Bowl, 3 beaten eggs.
3rd Bowl, Panko

Dredge fillets into flour, egg and then panko. Add fish to oil and fry until golden brown, about 4 to 6 minutes. Remove to a paper towel lined platter.

Spread the Garlic Aioli sauce on both sides of your baguette.

Layer some romaine on the bottom, then top with fish, sliced tomato, red onion and then finally, a little more romaine on top. Add top portion of bread to make a sandwich.


Garlic Aioli

Ingredients:
3 cloves garlic
1 cup mayonnaise
1/2 tbsp fresh-squeezed lemon juice
1/4 tsp salt

Preparation:

Crush the garlic cloves with the flat of a knife, and remove the skin. Then mince the garlic very fine. Add a pinch of salt, and using the flat of the knife again, scrap and press the garlic against the cutting surface to make a very smooth paste. It's making this paste from the fresh garlic that gives aioli its intense garlic flavor.

Add the garlic to a small bowl, and whisk together with the rest of the ingredients. Wrap and refrigerate for 30 minutes to allow the flavors to develop.


In closing, if you happen to be going to Hawaii and staying on the "Big Island" and want to Charter a boat and do some fishing, I would recommend the guys at Bite Me Sport Fishing in Kona, Hawaii.  Even though I started off on the wrong foot with the gents, they did do a good job and were very helpful training me on what to do with a not-so big fish.  I take the Blame for being a bit Wyoming and a tad nuts.  They responded as I would to a fat guy with a not so flattering outfit and a sarcastic tendency.  Good times were had by all.


Finito!


Saturday, January 15, 2011

Atole / Champurrado

If you’re like me you love to discover new things. I often come across new things I’ve never heard of before, sometimes it will be through people I talk too or articles I read on various blogs. However the case, I really do strive for those moments of inspiration and discovery. If you haven’t notice I have added some new Links to the right of this page with various Blog writers and web sites that feature food most of the time. From what I gather, these writers are from all over America and from other parts of the world. I’ve always thought to myself what a wonderful resourse to learn from.

This past week I was reading an article from “David Lebovits’s Blog”. The article was entitled “Atole”. This is the first time I have ever heard of this. Simply it’s a Mexican hot (Atole) chocolate also referred to as Champurrado. From all the background reading I’ve done on this drink, it’s mostly seen during Los Posadas (Christmas) and Dia de los Muertos (Day of the Dead).
The Drink was compared to “crème anglaise” in the article, but I’ll be truthful, I haven’t a bloody clue what Crème anglaise is like. I have heard of it, but I have never tasted or made it. So, like all things that are a mystery to me I Googled the crap out of it. Here is what Wikipedia told me: Crème anglaise (French for "English cream") is a lightly pouring custard used as a dessert cream or sauce. It is a mix of sugar, egg yolks and hot milk, often flavored with vanilla.

So this new drink is still perking my interest and has me even more curious to what it’s all about. I know that this drink runs deep in Mexican culinary culture. From what I have read it goes as far back to Mayan culture which makes much since. Most know the background of chocolate and its roots with Mayan culture. So after reading all this information about this drink I start to see why this drink has spanned the test of time. Well firstly, it’s most commonly done with chocolate. And we all know how great chocolate makes things. You can pretty much cover anything in chocolate and POOF! Delicious! Well, almost anything, I would never cover a turd with it and eat it.

What appeals to me about Atole is how it can be morphed into whatever you want. The recipe is basic and allows for many possibilities with fruit and spices or maybe some types of meat or fish or even shellfish. I’m looking at this drink kind of like I look at Mole’ as a sauce.

In its basic form it sure does open a door of possibilities. But, first and foremost, try this just as it was meant to be, in a coffee cup with a spoon and the traditional tamale at its side.

Atole  (this Recipe was used from “David Lebovits” blog)

makes 6 cups

This recipe makes quite a bit and you’re welcome to cut the recipe in half. The chefs told me that sometimes people use rice or oat flour in place of the corn starch. To get the seeds out of a vanilla pod, split the bean lengthwise and use the blade of the knife to carefully scrape out the seeds. The pod should be reserved for another use, such as infusing poaching liquid or tucked in a bin of sugar to perfume it.

They don’t use much sugar in their Atole but you might want to increase the amount to taste. If you can get Mexican piloncillo sugar, this is a good place to use it.


1/3 cup (40g) corn starch
6 cups (1.5l) whole milk
1/3 cup (65g) sugar
the seeds of 1 vanilla bean, preferably Mexican

1. In a medium bowl, whisk together the corn starch with about 1 cup (250ml) of the milk until the corn starch is dissolved and there are no lumps.

2. Pour the rest of the milk, the sugar, and the vanilla seeds into a large pot, then gradually whisk in the corn starch mixture.

3. Cook the mixture at a boil over medium-high heat, whisking constantly and vigorously, until the Atole is thickened to the consistency of runny pudding. It will take about two or three minutes.

4. Remove from heat and strain the Atole through a mesh sieve before serving it.

Serving: Atole is served warm. If made in advance and you wish to reheat it, it will likely thicken quite a bit. If so, add some additional milk to thin it out.


I’m thinking that if the snow comes like they say it will in my neck of the woods this would be fun to make and experience. I think if you have kids they will enjoy it as well. Of course this will completely blow your diet plans for the New Year but I think this is a worthy cause to slide back into sweat pants for a few hours.


Finito!


Tuesday, January 11, 2011

Wyoming Beef

Until I moved to Wyoming, I had never heard of people buying a whole cow or ½ a cow. That just sounds weird. Can you imagine opening you freezer and having a wall of red meat jump out at you? Well, when I bought a half of a Cow from my best friend who is a cattle rancher here locally, that is what happened every time I opened our freezer. One evening while going to the freezer to pull out some choice cuts for a get-together dinner we were hosting, a sirloin roast made a successful escape onto my big toe. The initial thought was colorful, the initial words were strangled and mumbled so the kids wouldn’t hear and learn a new set of word. This resulted in the purchase of a coffin freezer a week later. Perfect for our purchased cow and the million of other items we freeze on regular bases’.

We are just now getting the tail end of the last cow we bought and most likely will buy another come summer. I haven’t ever compared the price on meat bought from the store over a year versus the price I pay for buying a cow and then having it processed. Frankly I think it’s probably a wash in the end, but I don’t buy meat out of saving a few dollars. I buy meat for its quality and flavor. I’m no expert by any standards for what makes for good Cow. I can tell you I have had all types over my carrier and I know what I think tastes good versus what tastes like……. Well, anyways what isn’t such a great purchase.

Wyoming home grown beef is in my opinion, a superior beef to what you buy in the grocery stores. It has a distinctly better flavor and you can tell the difference when cooking and eating it. I know a little about there growth and what they eat per my rancher buddy. I know that he and many other Ranchers in this part of Wyoming take there product to market often. Sometimes they make money sometimes they lose. Like any business you have ups and downs. We have quite a few locally owned businesses’ that deal in the sell of our local ranchers products.  Personally, I support them whenever I can because they are important to my cooking and producing a superior product at the dinner table. Here are a few of my favorites that I buy from:


Clarks Meat House

Wyoming Pure


Wyoming Custom Meats

I never have an issue supporting local business.  If you sell a good product, I'll fork out a few more dollars for it.  Now I want to be clear I don’t Snob our local Grocery stores meat departments.  I'm pretty sure my wife ordered our Prime Rib Roast that we cooked for Christmas from one of them.   I just prefer locally raised beef over store bought.

Involtini - Sicilian Grilled Rollups

Ingredients:
2 1/4 pounds veal, in 6 cutlets
1 1/2 cups Japanese Panko
3 ounces grated Parmesan
3 tablespoons minced parsley
6 cloves finely minced garlic
Coarsely ground pepper
Sea Salt
Extra virgin olive oil

Prepping The Meat:
Begin by pounding the slices of meat with a pounder to flatten them out.

Shackin Bake:
Combine the crumbled bread with the grated cheese, parsley and garlic, and season the mixture to taste with salt and coarsely ground pepper.

Ohhhhhhhhh the loveliness!!!!!!
Rub the slices of meat with olive oil and dredge them in the bread crumbs, then roll them up and stick them with skewers so they stay closed.

HEAT:
Set them over the coals (or your gas grill that most people have, Coals will give a distinctly different flavor) and cook them until done, basting them with more olive oil.

Finito!

Saturday, January 8, 2011

Couscous Salad

Napa Valley, CA
Cold winter months seem to last forever. Would you hate me if I told you I love them? Well, I do. I love the snow and the way it has a habit of making everything look fresh and new. Of course the negative degrees ware me down over time and make going outside a bit of a chore. My poor wife is not a big fan of cold, but she does enjoy the activities they bring. One of the fun things that come about during the winter months for us over obsessed foodies is when we have “Food Experience Summit”. These dinners are usually hosted by a group of people who share a love for culinary food. The summits happen twice a year traditionally. It usually consists of 10 or more people who organize a Friday or Saturday evening at some location were the foods are presented or prepared then presented. It’s totally up to the individuals. Most people chose to prepare on site to demonstrate the preparation and presentation process, which many feel is a key element in the experience. I happen to agree with that.

I have both attended and been part of these summits. They are a lot of hard work and planning. As some of you may know that when it comes to food it is hard work getting to the end product. Especially when preparing for more than 6 people. It takes planning and strategic thinking. I recall one summit where the invites got out of hand and we prepared dishes for more than 60 people. That event turned from a summit to a work night at a restaurant kitchen. You see the key to these summits is for the home cook or chef to sit with the participants and experience the food with everyone. We discuses flavors, texture and sensations of each dish presented. Some may think this is food snobbery, but in fact it’s a learning event for the cook/chef and also the diners. It’s more so, what works and what doesn’t work, what tastes wonderful and what’s not so wonderful. Overall it’s a grand adventure in food and also humbling. Its not often we home cooks/chefs open ourselves to criticism and constructive dialog about our food. I think it’s a healthy part of growing in your skills and thinking about food.

My very first summit that I attended but did not cook at was not small but wasn’t big either. If I recall there was maybe 16 or so people. Of that 16 only 6 of them cooked and presented, of course we all aided in setting up and serving being careful to not impede the chef or offer any suggestions while they were cooking. That came after.

I didn’t contribute to any critique or offer up suggestions for changes mainly because I felt that these guys were many levels above me in skill and age. Who wants a young chef just starting out in there culinary career to season his so called “Pan of Experience” shooting recommendations on something he doesn’t completely understand. I think I chose the right path. In fact I offered up many complements and inquired of ingredients and the use of those ingredients. I wanted to learn. I wanted to understand how they made an ordinary flank steak taste so surreal and become so tender that it melted in your mouth as you chewed.
Executive Chef, Charles Sutton

After my first Summit I was afraid I would never be invited back because of my age and my question after question to the chefs. I was pleasantly surprised when I received my mailed invitation to the 2nd Summit that was held during the summer time in Napa Valley, CA. Hand written on the back of the invitation was a note from my mentor and Chef friend, Charles Sutton, “My colleagues have asked that you attend our summer summit. Your thirst for learning about food and your incessant questions have reminded us why we do this. I expect you to wear a tie this time.”

Estes Park, CO
It has been many years since those first 2 summits and I have hosted and also been part of a few since then. I’ve played with the idea of recreating them here in wonderful Wyoming, but they never seemed to gather interest. Maybe someday it might happen maybe not, only time will tell.

This recipe is something I prepared once at a Summit in Estes Park, CO. I have since modified it on recommendations from my peers to make it more appealing and a bit friendlier it can be be duplicated in the home kitchen or restaurant kitchen.


Couscous Salad

Ingredients:
2 medium red bell peppers
2 medium yellow bell peppers
1-1/2 cups instant couscous
Sea Salt
1/4 cup olive oil
1/4 cup fresh lemon juice
1 tsp ground cumin
Freshly ground black pepper
Cayenne pepper
1 large English (hothouse) cucumber, peeled and cut into 1/2-inch dice
1/2 cup Moroccan or other small, black, oil-cured olives, pitted and coarsely chopped
2 green onions, white parts and about 3 inches of green parts, minced
1 large clove garlic, minced
1 pound ripe beefsteak tomatoes, peeled, seeded, and cut into 1/2-inch dice
2 Tbsp finely chopped parsley


Roast Them Peppers:
Preheat the broiler. Put the peppers on a sheet pan lined with foil and broil for about 15 minutes, turning once or twice to ensure they blister and blacken evenly. Remove to a bowl, cover with plastic wrap, and let cool.

Peel, seed, and cut into 1/2-inch dice. Set aside

Mixing it up:
Put the couscous in a large mixing bowl. Pour 2-1/4 cups boiling water over the couscous. Add 1/2 tsp sea salt and stir. Cover with plastic wrap, and let stand for 10 to 15 minutes, or until swollen and tender.

In a small bowl, combine the olive oil, lemon juice, and cumin. Season with seas salt, pepper, and cayenne to taste.

Tomato/Tomato:
To peel fresh tomatoes, core them and put them in a pot with 2 quarts of boiling water for about 30 seconds. Remove; cool under running water, and peel. Halve, lengthwise, and gently squeeze to remove the seeds.

Bringing Together:
Fluff the couscous with a fork. Add the cucumber, olives, green onions, garlic, tomatoes, and roasted peppers. Pour the dressing of your choice (not a creamy dressing) over the couscous and toss to combine. Let stand at room temperature for at least 1 hour.

Almost Done:
Just before serving, stir in the parsley.


The only thing you have to be concerned about in this dish is overcooking the couscous by pouring on too much boiling water. Otherwise, this salad is very forgiving. It allows you to adjust seasonings and substitute other ingredients almost at will. A few suggestions are chopped grilled vegetables, sautéed mushrooms, and grilled or poached chicken are just a few of the ingredients that can be added to this salad.


Finito!

Thursday, January 6, 2011

Mandarin Orange, Spinach, & Almond Salad

OMG! Can I just have a few more TV commercials, Web pop-up’s and mailbox stuffers telling me I’m overweight, out of shape and pretty much the worst eater to ever walk the planet earth? I don’t need Jenny to help me lose weight. I don’t want Subway to drain my wallet while they stuff over proofed bread packet with veggies and 1 gram of meat down my gullet. I don’t feel the urge to convert all food in my pantry into a point system to give me math anxiety. And, I don’t need and overly self righteous personal trainer with a vendetta about “the fat kid” to teach me exercises that not only will give me Abs in 60 days but can also double and as a lethal weapon if ever attached by a horde of Al Qaeda operatives. I just don’t need it!

Food is my love. Always has been, an always will be. I don’t think I abuse it, except for those rare occasions that I eat something so wonderful that it speaks too me to have “just a little more.” I can’t recall a time in my life were I was that so called “perfect weight” or that “perfect body frame.” I do recall in grade school being teased, but I couldn’t recall if it was for being overweight or just plain Dorky. It really doesn’t matter anymore because at 41 years old, I think being overweight and dorky is cool. People just don’t realize it yet. (Sarcasm)

I think that your body often tells you what it wants with craving and yearnings. It also tells you when you’ve had too much of something by various feeling and odors. I won’t go into that any further. I know during the holidays people often indulge themselves in foods and treats that they would usually not have but once a year. I hope this won’t sound too X rated but it really is a food orgy during the holidays. A so called free for all eating experience. Eating things you have never had or have only once a year. So the natural thing to do is eat A LOT.

But, as I stated your body lets you know when enough is enough and its time for something healthy. Yes I said healthy. But, I’m saying healthy on MY terms and my terms only. When I get to the point when I really want a nice fresh salad with a little meat I want to make it with the items I like. I don’t want a load of flack seed poured all over it so I can crap healthier. I don’t want a powdery protein supplement to make my lettuce taste as if it’s been dredged in chalk. I want fresh, crisp, cool, and organic (when I say organic I’m saying not fake or libratory manufactured) just old school lettuce.

I don’t want to downplay the importance of being healthy or eating healthy, but I also don’t want to have it become that all consuming lifestyle that will rip away my enjoyment of good food and appreciating it. I think there is a balance that will fuel your body’s needs, all the while, not draining your bank accounts after the New Year even more than the holidays have.

If you noticed in my last Blog post you can see that my mind is moving towards thinking about cutting back on the crap and thinking about something more nutritious that my body is telling me it wants. So the natural thing for me to do is recall all those recipes that have a natural lean towards the healthy side of life. I have those things in mind and I don’t mind making them and eating them up. You see, you don’t need to sacrifice flavor and settle for the BLAH.


Mandarin Orange, Spinach, & Almond Salad

3 to 4 handfuls of spinach leaves
1/4 cup sliced onions
1 (11oz) can mandarin oranges, drained
1/4 cup slivered almonds, toasted
1/2 cup Extra Virgin olive oil
2 tbsp. vinegar
1/2 tsp. Sea salt
1/4 tsp. Course Ground pepper


In the Bowl:
Mix onions, spinach, oranges, and almonds in a large salad bowl. Place aside.

Dressing UP:
Combine the Extra Virgin olive oil, vinegar, Sea salt, and pepper together to make the dressing.

* If you have a food processor I recommend adding all ingredients except the olive oil in the processor and turn on high speed. While the processor is running add the Olive oil very slowly. Should look like a thin thread of oil when pouring.*

Keep the dressing chilled for a minimum of 2 hours.

Take dressing out of the refrigerator.

Toss the dressing with the salad ingredients in the large salad bowl and serve immediately.
I often like Chicken in this salad when I make it. I like the chicken to have been marinated. The flavor I think complements this is a Sesame Ginger dressing of some kind. I simply buy the dressing from the grocery store and marinate the chicken for 48 hours. When I’m ready to have the salad I grill the chicken ahead of time. Once it’s done I allow the chicken to rest for 15 min (this is when I put the salad together). I then cut it in very thin strips and lay the chicken on the top of my salad.

Last year, when I made this salad around the same time, I felt so fantastic after I ate it that I ran to the Store and bought a pint of Häagen-Dazs to follow up for dessert.

Finito!

Sunday, January 2, 2011

Grilled Sesame Crusted Tuna

I’ve been pondering and mulling over ideas for a few days now, trying to think of something that will be useful, simple and appealing to you. I chuckle every time I come up with something because of the story behind the recipes. Sometimes events lead me to think of recipes. Often, it’s a simple subject that brings me to recall a recipe. Most, if not all recipes have a story (often kind of twisted) behind them. My stories are always fueled by emotion, laughter, compassion, inspiration, people I talk too face to face and emails that randomly pop into my mailbox from time to time.

One of the great things about New Years Day is that I get non stop episodes of my favorite food programs. Since noon I’ve been watching “Two Fat Ladies” on the cooking channel. I enjoy learning the styles and themes of the British. I get to experience how people across the pond love to cook, Like Nigella Lawson. I feel it contributes to my style of cooking and sometimes I get great ideas to try.

I’ve had the pleasure to know quite a few people from across the pond and back in the days of my Kitchen years, I spent quite a bit of time with them. But firstly, my good friend Terry would shoot me if I didn’t point out that he is Welsh, and should never, be confused with the British. Personally I can’t sort out the difference but that’s a whole different Blog altogether. I had dinner with my friend Terry and a half a dozen other people from around the world at a place called “The Broker Restaurant” in Denver, CO. The food was outstanding but one dish over the others stood out in my mouth and mind. The dish I ate was called “Sesame Crusted Tuna”. Now, normally I would never EVER order so-called fresh seafood in a land locked state but the maître d'hôtel (head waiter) recommended the dish highly since the Tuna had just been caught and delivered that day and they were running low on supply as he stated they do almost every day. I took the maître d'hôtel’s advice in mind, while thinking to my self, “This fellow must be getting pressure from the Chef to push the Tuna so he doesn’t lose his overhead among other part of his anatomy when the owner sees how much he spent on the Tuna.”

Terry, in his dry Welsh manner, teased me about being afraid to order fish. He said that you American’s are “Dozy” when it comes to fish and what to know about them. I explained to him in my George W. Bush blunt manner with a few colorful words and phrases, that in the states you take your taste buds into your own hands by risking that the fish is fresh. Unlike Europe, in America you just never know how old and/or frozen the fish has been. My friend would not give up the taunting, and so in the best interest of international relationships, I ordered the Tuna.


It was Delicious, and like so many things my friend Terry has exposed me too in the food world, he didn’t steer me wrong yet again. There has only been a few other times were the fish was so fresh, and absolutely mind blowing that it stuck in my memory.  I still often think about San Francisco and Hawaii. In Hawaii, I caught a Mahi-mahi and took it back to our bungalow and cooked it with fresh scallops for Amy and me and our good friends that we went there with.

The “Sesame Crusted Tuna” I had at “The Broker Restaurant” was so amazingly fresh that you could taste the ocean. From what my friend Terry told me, that is when you know you have yourself some pretty fresh fish. The Tuna was hearty, rich in flavor and had delicate texture. I can only keep describing it as OUTSTANDING!

Because of the price I don’t often cook with Tuna but after many years playing with it, when it was available to me, I recreated my own taste and style all the while thinking about the delicious meal I had at “The Broker Restaurant”


Grilled Sesame Crusted Tuna

Sesame mix:
1 cup sesame seeds
2 teaspoons minced garlic
2 teaspoons minced, peeled fresh gingerroot
1/2 teaspoon dark oriental sesame oil
1/4 cup extra virgin olive oil
2 tablespoons fresh lemon juice
2 tablespoons soy sauce

Sauce:
1 cup dry white wine
2 tablespoons fresh lemon juice
1/4 cup heavy cream
2 tablespoons soy sauce
10 tablespoons cold unsalted butter,

You’re going to want to prepare 4 (1/2-pound 1-inch-thick) tuna steaks

Sesame mixture:
Preheat oven to 375 degrees F. On a baking sheet toast sesame seeds in oven until golden, roughly about 5 to 10 minutes.

*After letting the sesame seeds cool*

Add in a small bowl and stir together the sesame seeds, chives, garlic, gingerroot, sesame oil, olive oil, lemon juice and soy sauce.

Prepare grill:
*While grill is heating, make sauce*

Sauce:
In saucepan boil wine and lemon juice over high heat till reduced to about 1/3 cup. Incorporate the cream and simmer, stirring occasionally, till reduced by half. Add soy sauce and reduce heat to low. Whisk in butter, one piece at a time, lifting pan from heat occasionally, to cool mixture, and adding each new piece of butter before previous one has melted completely. (Sauce MUST NOT get hot enough to liquefy.) Keep sauce warm only.

The Task of Grilling:
Coat both sides of each tuna steak with sesame mixture. Grill tuna on oiled rack set about 6 inches over heat source, about 1.5 minutes on each side. Your aiming for a grilled outside and a raw inside. Key to keeping the crust from falling off is not to mess with the Tuna once on the grill only touching it when turning over. If you don’t feel confident with you skill on the grill you can always just use a Sauté pan on high heat searing both sides for the same amount of time.

Serving:
You can serve this in several styles. You can cut the Tuna in slices and fan them out on the plate. Or you can julienne some veggies and make a little pile on the center of a plate or bowl and then place the Tuna Steak on the top of that. However you plate the tuna, once you do, you will then drizzle the sauce over the top of the Tuna and around the plate or bowl.

This is a refreshing dish with bold but yet subtle flavor. My hope is that you experience the freshness of the sea and taste the ocean with every bite.

Finito!